
Some links in the post are affiliate links and I get a commission from purchases made through some links found in the post.
Oakleaf Hydrangea is a species of flowering plant native to the southeastern United States. It is a widely sought ornamental plant grown for its flowers.
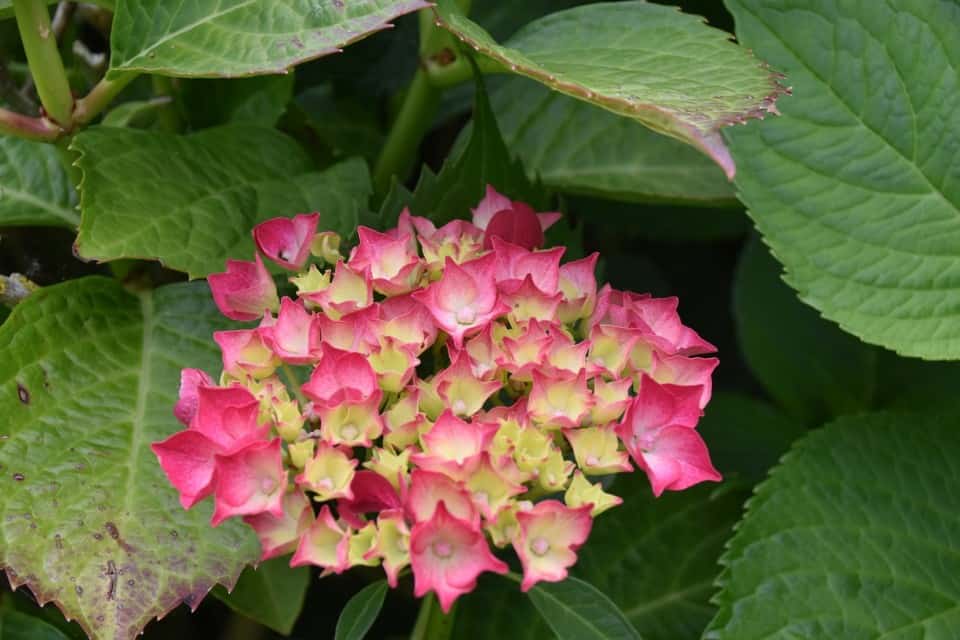
It appears as a whitish-pink blooming shrub with four seasons of interest and it blooms and grows best in hot areas and in the months of May to July.
The plant’s flowers grow in large clusters, whereas its leaves are large and distinctive. The flowers are known to be originally white and gradually turn to purplish pink.
The plants do well in slightly acid well-drained soil and are not too demanding regarding fertilizers. They can be easily propagated by cutting.
Though these plants are quite magnificent and have attractive foliage, spots can ruin the beauty of the leaves. But, they are not necessarily fatal for the plant.
The black spots on the leaves of your hydrangea are mainly caused by a fungus called Cercospora. They are a fungi that live in the soil and are transferred to the leaves by rain or water over the leaves.
Cercospora has normally infected your plant 1-2 months before your hydrangea begins to show the blacks spots which is common to occur in summer to fall time.
What are Black Spots on a Hydrangea Leaf?
 There can be many reasons why Hydrangea leaves get black spots.
They can be due to bacterial or fungal infestation, poor air circulation between plants, branches/stems crowded together, particularly near the base of the plant, excessive humidity, overhead sprinklers, and lots of rain.
1) Bacterial spots
Xanthomonas species mostly cause bacterial leaf spots. These spots appear on those plant leaves kept under excessively moist conditions.
2) Fungal Leaf Spots
Many different fungi can cause fungal leaf spots. Some fungi that affect the plant are:
1) Cercospora Fungi
The fungal spots are commonly caused by fungi Cercospora. These fungi live in the soil and are transferred to the leaves by rain or water over the leaves.
It takes almost a month or two before spotting symptoms appear on the leaves. This fungus normally infects the plants in the autumn season.
2) Black Spot Fungus
Black spots on hydrangea leaves can also develop due to the black spot fungus.
Black spot fungus starts appearing in the spring when temperatures rise to the sixties, and the garden remains moist for more than six hours.
When temperatures reach the seventies, the disease progresses until temperatures rise above 85 F.
First, the infection appears as tiny black spots, later becoming margined with a ring of yellow hue. This can progress to complete yellowing of the leaf.
3) Colletotrichum
Anthracnose, also characterized by brown to black spots, is caused by Colletotrichum species. The spots are dark brown to black with tan centers.
The distinguishing feature of this fungal infection is that the spots appear on both the leaves and the plant’s flowers.
The anthracnose, if severe, can lead to the death of your plant. All symptoms of fungal infection become severe in summers during heavy rainfall. Plants infrequently flower during the infection.
The spots are not lethal to the plant, and the Hydrangea with leaf spots usually survive but has slowed growth and can decline and defoliate early.
The spots appear first on the lower, older leaves and then on the new growths.
If you are enjoying this article, check out our article on why are my hydrangea leaves curling.
Are Black Spots on your Hydrangea Leaf a Bad Thing?
Black spots are bad from a visual point of view. They ruin the beauty of the plant, and if any of your plants become infected can ruin the beauty of our flower bed or garden.
It is a waste when you carefully plant various plants in your garden, and some turn out to be infected with fungi because this needs careful control
The black spots on hydrangea leaves are not lethal. The plant can still grow, although the speed of growth is retarded.
The infection, if severe, can lead to defoliation and loss of vigor. Black spots indicate damp, humid conditions and poor sanitary conditions of the garden.
They also indicate fungus breeding in the soil. So the spots can act as indicators signaling you to pay attention to your beloved garden and its inhabitants and necessitating the use of fungicides.
It would be best if you acted quickly to eliminate the infected parts of the plant so that the fungus does not infect other precious plants in your garden.
How do you get Rid of Black Spots on Hydrangea Leaves?
 We all know prevention is better than cure. So we’ll start with ways to prevent damage to your plant.
1) Thin and trim out the stems of your hydrangeas in spring. Remove 1/3rd of the older stems. You can also remove the stems after they have flowered.
This will promote airflow through the leaves, helping the moisture evaporate and keeping the leaves dry.
2) Avoid overfertilizing your hydrangeas because too much fertilizer makes the plant more susceptible to diseases.
Instead, try using a slow-release organic fertilizer instead of chemical-based fertilizers.
3) Avoid using overhead sprinkler systems or watering over your hydrangea leaves. Instead, water the plant base first with a garden hose or drip hoses.
If you want to use a sprinkler, make sure you’re using it on a sunny day, and the soil is not too damp between the sprinkling.
4) Throw any diseased leaves, stems, flowers that you remove from your affected hydrangeas and keep your infected plant away from the rest of the lot to minimize the risk of cross-infection. Don’t use diseased leaves as compost.
5) Remember to clean up fallen leaves around your plants in the late fall season.
6) If you fear reinfection the next season, spraying new hydrangea leaves with fungicide every 10 to 14 days on bushes that showed damage last year may be helpful.
Don’t forget to spray the stems and undersides of the leaves as well.
Fungicides
Fungicides can be applied if your leaves are affected by a fungus. Copper-based fungicides are preferred for this purpose.
Chlorothalonil and thiophantate-methyl containing fungicides control both Cercospora leaf spots and anthracnose.
Treating already damaged leaves is not an effective and worthwhile option because the leaves will eventually fall off in the fall.
Practicing good sanitation habits are the best solution to combat recurring black spotting of the leaves.
Carefully clean all the damaged, infected leaves when they fall. Water splashing from infected plants should also not spread to adjacent leaves and nearby plants since this can transmit the spores.
When landscaping, make sure to choose disease-resistant hydrangea plants.
This would lower the risk of fungal infection and minimize the risk of recurrence and spreading.
Check the nursery to ensure that you’re buying a disease-resistant plant.
Natural Remedies:
Neem oil works well in treating black leaf spots. It is a natural oil obtained from the leaves of an evergreen tree. It functions to eliminate fungi.
Mixing bicarbonate soda and some horticultural oil can also make a solution that treats black spots by altering the pH such that the fungus doesn’t survive the altered pH.
Start preventative spraying before the temperature reaches sixty. Read the label and directions for the method you choose and follow them closely
There are also some other all-natural methods to treat leaf spots on hydrangeas, including spraying the leaves with compost tea, liquid kelp, garlic oil, or hydrogen peroxide.
Compost tea is the eater extracted after soaking compost for a few days. Compost tea uses beneficial bacteria to remove the bacteria-causing spots on the leaves.
Remember to use diluted garlic oil for spraying purposes. Dilute hydrogen peroxide in 8 times its amount before use. Avoid contact with hydrogen peroxide on the skin.
If you’re new to planting hydrangea plants in your garden, here are some tips:
- Plant hydrangea in areas that receive direct sunlight.
- Use a well-draining soil mix if planting in a pot.
- Avoid watering in the evenings.
- Do not spray water your plant but prefer ground watering.
- Make sure your tools are clean, and always bleach your instruments after cutting or handling fungus-infected plants to prevent the risk of spread.
- Use organic material or compost into the soil before planting your plant.
- Spread a layer of mulch a few inches away from the stem of the Hydrangea and remove it every winter.
- Use a low nitrogen fertilizer.
- Spray fungicides every 2 weeks when beginning to show new growth.
Final Thoughts
 Oakleaf Hydrangea, native to the United States, has beautiful flowers and foliage, but black spots can be an annoyance and harm the beauty of your plant.
Luckily the black spots caused by fungus or bacteria are not fatal for the plant and can be easily prevented by practicing strict sanitation techniques and avoiding overwatering.
Damp conditions facilitate fungus growth, so there should be sufficient time in between waterings.
Using neem oil and other home remedies such as bicarbonate and compost tea can prevent the risk of recurrences and kill the fungus already present on the leaves.
Following simple tips when a planting Hydrangea and using clean tools can prevent damage to your precious plants.
Before you go, here are some more related articles I encourage you to read below to help solve more of your gardening issues:
Why are my Hydrangeas Turning Green
Why Does My Hydrangea Have Small Flowers
How to use baking soda to grow hydrangeas
About the Author:
Saad Ansar
Saad is an avid gardener himself and is a great lover of plants, animals, photography, & people. Currently, he is focused on photographing indoor plants & captioning beautiful outdoor sceneries. He writes and rewrites in-depth articles on nature and science.
